
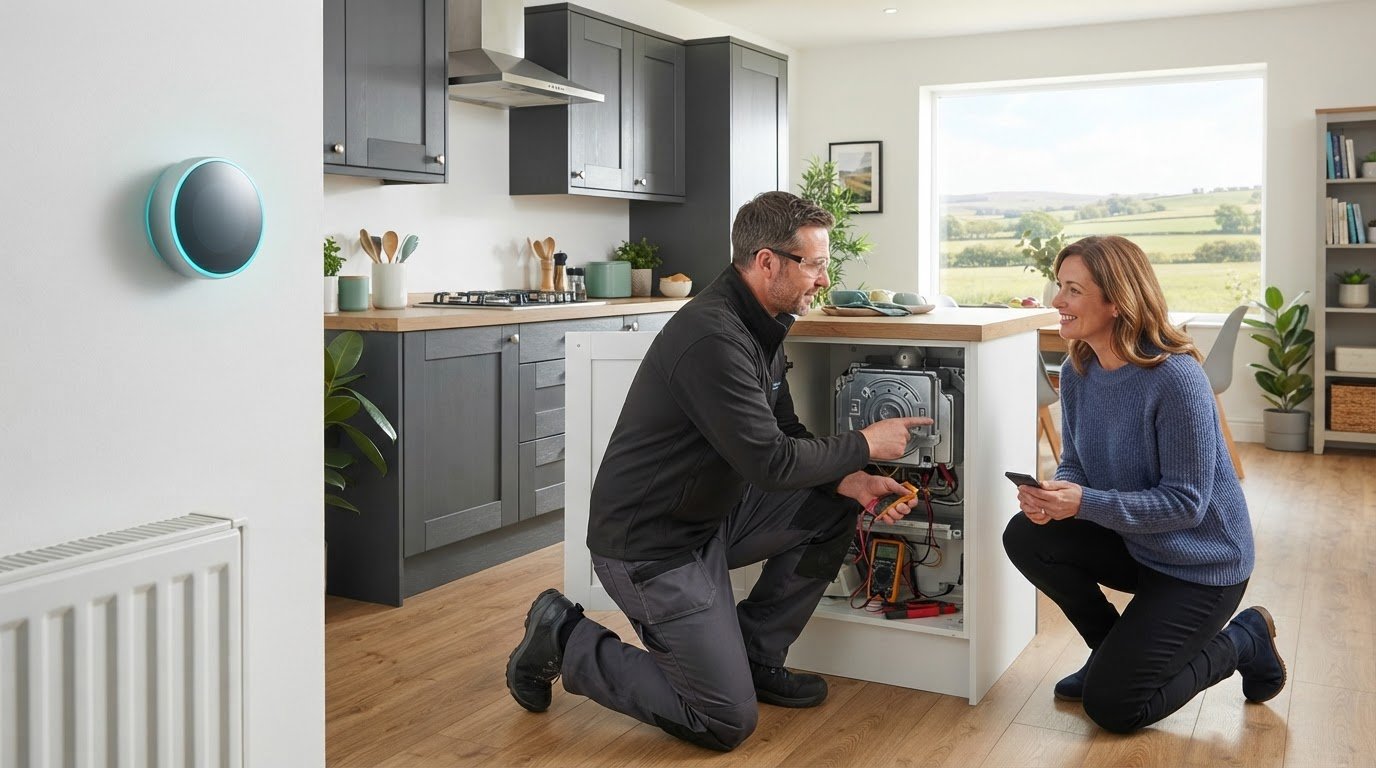
Complete Smart thermostat installer Gretna Guide for Success
A smart thermostat won’t automatically make a home more efficient. It can improve control and comfort when compatible with your boiler or heat pump, and a smart thermostat installer in Gretna can assess your heating setup before fitting it. The thermostat and heating system need to communicate properly.
It’s sensible to want clearer control without unexpected installation complications. This guide explains how to assess whether a smart thermostat suits your home, what installation and testing involve, and what to expect from the handover, installer credentials and warranties. You’ll also learn which details affect the work, so you can make an informed decision and understand what should happen before the system is ready to use.
Key Takeaways
- Check that the thermostat matches your boiler or heat pump, including its wiring and communication requirements.
- Learn which parts of installation and replacement depend on your existing controls and heating setup.
- See what system tests and practical guidance should help you feel confident using new settings and schedules.
- Understand how to assess installer credentials and clarify what any warranty covers.
- Find out where a smart thermostat should be placed and when professional installation can help avoid wiring or setup issues.
Would smart thermostat installers actually improve your home?
A smart thermostat can improve heating control when it works with your boiler or heat pump. A smart thermostat installer in Gretna can assess the existing system, wiring and controls before installation. That matters because a connected thermostat cannot manage heating properly if its power supply or boiler interface is incompatible.
Heating engineers who install smart controls serve Gretna. Choose an installer who can assess the boiler connection, wiring and thermostat compatibility, rather than treating every system as identical.
Yes, an installer can provide a quote, and a home survey can clarify what the installation involves. The price depends on the boiler, existing controls, wiring and any additional work, and is provided after a quote request.
Start with compatibility. Note the boiler or heat-pump make and model, then compare it with the thermostat’s supported systems. Resideo advises installers to check whether a thermostat needs a mains or low-voltage connection and whether the boiler interface supports on/off, OpenTherm or another communication protocol. These details determine how the thermostat communicates with the heating equipment.
Wiring is just as important. Some smart thermostats need a common wire, often called a C-wire, for continuous power. Without one, a thermostat might not power on, or its operation could disrupt the heating system. The installer should identify the available conductors and confirm the correct power arrangement before connecting anything. Don’t assume that wires from an older thermostat serve the same functions on a new model.
Boiler connections vary. A thermostat may switch the boiler on and off, or use a compatible communication protocol to control heating. With OpenTherm, for example, both the control and boiler need to support that connection. A heat pump also needs compatible controls, as heating and cooling specialists such as Aircool note when configuring smart hardware, so don’t assume that a thermostat designed for one system will suit another.
These checks help answer the practical question: will the upgrade improve your home? A smart schedule can make it easier to heat the whole home when needed and reduce unnecessary heating. Smart thermostats can cut heating bills by up to 25% over time. But a home with an effective programmer and thermostat has less room for additional savings. Consider whether the current system leaves rooms too warm, heats an empty home, or requires frequent manual adjustments.
- Identify the boiler or heat-pump model and current thermostat.
- Confirm the thermostat’s voltage and supported boiler connection.
- Ask how the existing wiring will power and control it.
- Consider whether smarter scheduling would improve your current heating routine.
HVAC thermostat installation and replacement
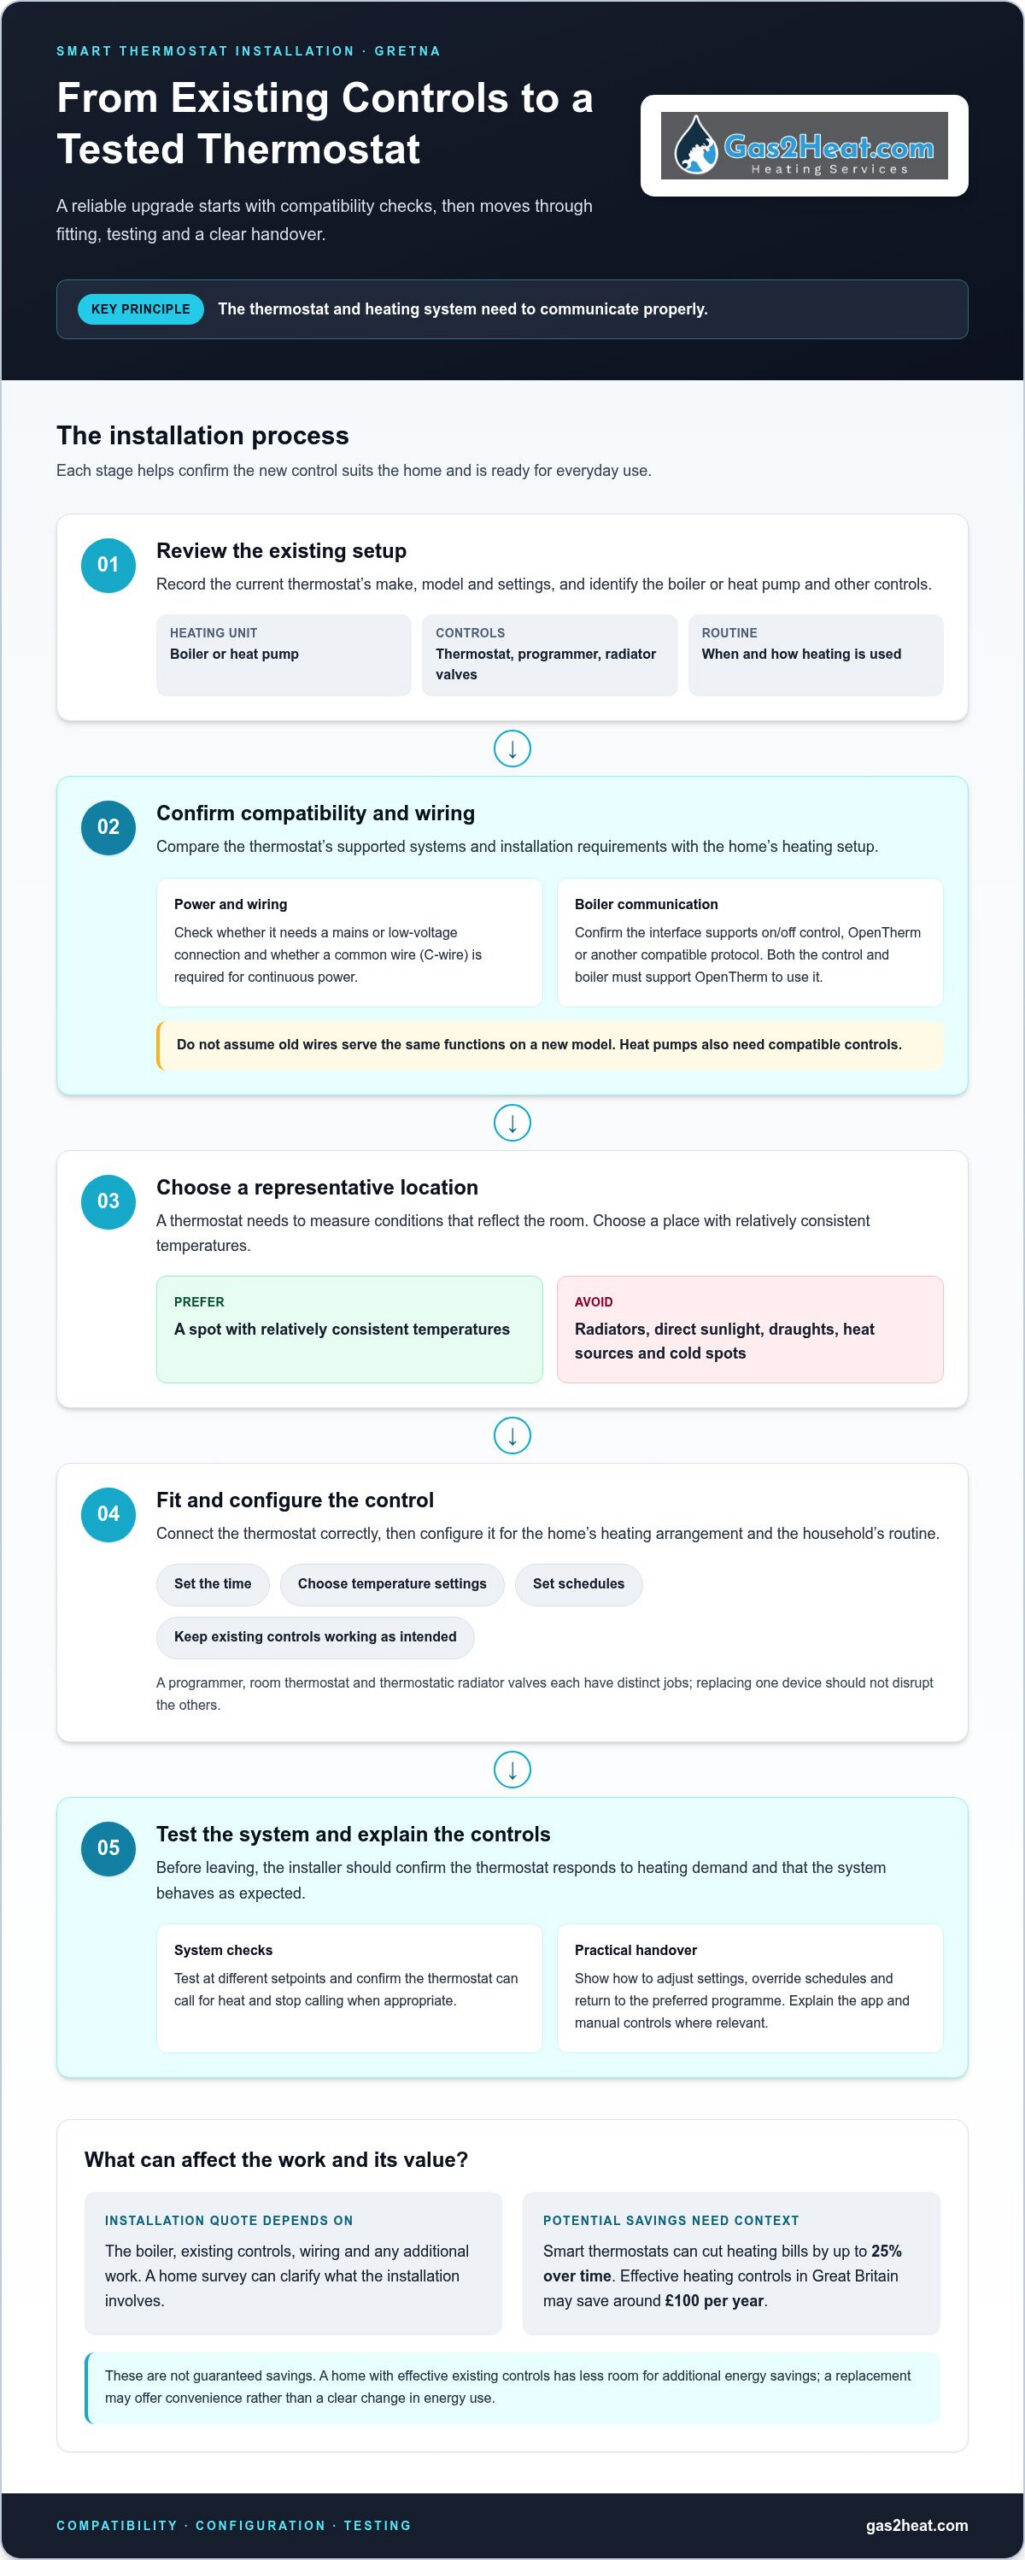
A thermostat replacement starts with understanding how the existing heating system works. Record the current thermostat’s make, model and settings, then note how you use heating throughout the day. For example, a household with changing routines may need a different schedule from one with consistent working hours. These details help guide configuration, rather than simply copying old settings onto a new control.
Next, the installer assesses the existing controls and boiler arrangement. A programmer, room thermostat and thermostatic radiator valves each perform distinct jobs, so replacing one device shouldn’t disrupt the others. The manufacturer’s instructions explain the new thermostat’s functions and installation requirements. Identifying each existing control also helps distinguish a straightforward replacement from work involving wider changes to the heating system.
Position affects how well a thermostat measures temperature. A location beside a radiator, in direct sunlight or near a draught may not reflect typical room conditions. Choose a place with relatively consistent temperatures, away from heat sources and cold spots. The installer can then configure the control to suit the home’s heating arrangement and explain which settings govern the boiler.
A practical replacement process includes these steps:
- Review the current setup. Identify the thermostat, programmer and relevant boiler controls.
- Match the replacement. Compare the chosen model’s functions and installation instructions with the home’s heating arrangement.
- Fit and configure. Connect the thermostat correctly, then set its time, temperature and schedule options.
- Explain the controls. Show how to adjust settings and return to the preferred programme.
Don’t assume a newer thermostat automatically improves performance. In Great Britain, effective heating controls may save around £100 per year. The useful question is whether your current controls leave room for better scheduling or temperature management. If they already match your routine, replacing them may offer convenience rather than a clear change in energy use.
For a smart replacement, the app setup and control layout matter too. Make sure you understand how to change the temperature, create a schedule and use manual settings. Keep the manufacturer’s instructions accessible, especially if other household members will use the system. A clear handover makes everyday adjustments easier and helps avoid confusion between thermostat settings and boiler controls.
Where a new control is part of a broader heating upgrade, consider how the boiler and thermostat should work together before choosing the replacement. A smart thermostat installation can be considered alongside the home’s existing heating setup, so the chosen control and its intended use are addressed as part of the work.
Installation inspection, testing and user training
Before leaving, the installer should confirm the thermostat responds to heating demand and the system behaves as expected. Resideo advises testing the system at different setpoints and showing homeowners how to override schedules. This practical check demonstrates that the thermostat can call for heat, stop calling when appropriate and accept manual changes through its controls.
Begin with a visual inspection of the finished installation. Check that the thermostat is secure, its display is readable and its wiring connections are properly enclosed. The installer can then compare the displayed temperature with the room conditions and confirm the device responds when the target setting changes. A nearby radiator or direct sunlight can affect readings, so placement matters during assessment.
Testing should follow the system’s heating arrangement. For a boiler, a call for heat should trigger the expected response from the boiler and connected controls. For a heat pump, confirm that the thermostat communicates with the heating system and uses its intended control settings. The installer should explain what each test demonstrates, rather than treating a lit display as proof that everything works.
A clear handover can cover these practical steps:
- Change the setpoint. Raise it to request heat, then lower it to stop the demand.
- Review the schedule. Find the programmed times and temperatures on the thermostat or its app.
- Override temporarily. Resideo recommends showing how to override schedules, including how normal programming resumes.
- Check system status. Learn where the control shows heating demand or a connection issue.
- Locate the instructions. Keep the manufacturer’s guide available for later settings changes.
Ask for a demonstration of the controls you’ll use most. For example, if you prefer steady warmth, make sure you understand how to adjust the target temperature without accidentally changing every scheduled period. If several people use the system, each should know the difference between a temporary adjustment and editing the programmed schedule.
Good training also covers what the thermostat can and cannot control. A room thermostat changes the heating demand; it doesn’t necessarily set every radiator’s temperature independently. If the home has thermostatic radiator valves, the installer can explain how those local controls interact with the main thermostat. This helps prevent conflicting settings and unnecessary adjustments.
Before the installer finishes, change the temperature yourself and confirm the display responds. If you use an app, check that it shows the same settings as the thermostat. A proper handover leaves you able to change the schedule, use an override and recognise the system’s normal response when heating starts.
Installation warranties and credentials
Compare what the warranty covers, who provides it and how to report a fault. A thermostat manufacturer’s product warranty and an installer’s workmanship cover are separate. One may address a device fault, while the other may relate to installation work. Read each document for its coverage, exclusions, duration and claims process before relying on it.
A warranty doesn’t replace a proper compatibility check. For example, a thermostat may be covered as a product but still be unsuitable for a particular boiler connection. Installation quality can affect whether the system responds correctly, including controls linked to hot water. Confirm which components and tasks each warranty applies to, and keep the installation record with the manufacturer’s instructions.
Compare local smart thermostat installers by looking for relevant heating-system experience, clear explanations of the proposed work and reviews describing specific outcomes. A review that mentions wiring, configuration or follow-up is more useful than a general rating alone. An installer serving Gretna should be able to explain how the selected control fits your home’s boiler or heat pump.
Credentials should match the work. Smart thermostat installation involves controls and heating equipment, so relevant experience with your home’s system matters. If the work also involves gas appliances, the person carrying out that gas work needs the appropriate qualifications. Don’t assume that a thermostat brand’s approval, product training or a general trade title proves competence for every type of work.
Use these points to assess the information presented:
- Scope: Does the written description identify the thermostat, heating system and installation tasks?
- Compatibility: Does it explain how the control connects to the boiler or heat pump?
- Testing: Does the completion process include checking the installed control and its operation?
- Warranty: Are product coverage and workmanship coverage described separately?
- Reviews: Do customer comments give useful details about communication, installation and handover?
Reviews can reveal patterns, but they can’t establish whether a thermostat is compatible with your system. For example, praise for an easy app setup doesn’t tell you whether a different boiler model uses the same connection. Use reviews to assess communication and service experience, then judge technical suitability against your own heating arrangement.
Keep the paperwork together. Save the quote, installation details, warranty documents and any test or handover notes. If a fault appears later, those records help identify whether the issue concerns the thermostat, its settings or the heating system. Clear records also make it easier to follow the right claims process and distinguish a product fault from installation work.
Smart thermostat installation
Smart thermostat installation starts with choosing a suitable model, not simply picking an advanced device by brand. Nest, Hive and Tado are options homeowners may compare, but the exact model must suit the home’s heating controls. A Gretna installer should base the work on the model and system combination, rather than assuming every thermostat works with every boiler.
Before an upgrade, gather the boiler or heat-pump details and the thermostat model you’re considering. This gives the installer practical information to assess the installation and identify connection requirements. If you’re comparing models, focus on compatibility, the controls you’ll use and how you’ll access settings. A feature you won’t use may matter less than straightforward temperature scheduling.
Placement is another key decision. A thermostat should sit where the temperature is relatively consistent, not beside a radiator, in direct sunlight or near a draught. For example, a sunny wall can make the device register warmth that doesn’t represent the rest of the room. Discuss a suitable position before fitting, because location affects how the thermostat senses room temperature.
A clear installation can be understood as a sequence of practical stages:
- Review the heating setup. Identify the boiler or heat pump, existing controls and chosen thermostat model.
- Plan the position. Choose a location with representative room conditions and an accessible display.
- Fit the device. Connect the thermostat according to its requirements and the heating system’s controls.
- Configure the settings. Set the schedule and preferences using the thermostat or its app, where applicable.
- Demonstrate operation. Show how to adjust settings and use the features included with that model.
Smart models differ in their controls and setup, so the manufacturer’s instructions matter. One device may use a wall control and app, while another may organise schedules differently. Ask for a walkthrough of the exact interface installed. Practise changing a temperature setting and finding the schedule before relying on remote controls or advanced functions.
Professional installation can help when wiring or heating controls are unfamiliar. If you lack experience working with electrical and heating systems, using a professional is a sensible choice—reputable contractors such as Inlightec Electrical Solutions routinely assist homeowners with safe residential wiring and electrical setup. A qualified Gas Safe registered engineer can handle relevant gas work, connect the controls and explain the setup in the context of your system, rather than leaving you to interpret model instructions alone.
Choose the smart thermostat installation that fits your boiler or heat pump, then make sure you understand its everyday controls. Arrange smart thermostat installation for a considered upgrade and a clear explanation of the fitted device.
Gas2Heat.com: Boiler Installation
Gas2Heat.com Ltd provides boiler installation when an existing boiler needs replacing or a home requires a new heating system. If you’re planning a smart thermostat upgrade alongside a boiler change, consider both together so the controls suit the heating setup. As your trusted local smart thermostat installer Gretna, Gas2Heat.com Ltd also offers smart thermostat installation, boiler servicing and boiler repairs.
For landlords, Gas2Heat.com Ltd provides Landlord Gas Safety Certificates. These services address different needs, from installing a boiler to maintaining an existing one or arranging the required landlord certificate. Choose the service that matches the work your property needs.
Contact Gas2Heat.com Ltd to discuss boiler installation or the heating work that fits your home.
Make your next heating decision with confidence
Choose your next step around the outcome you want from your heating: simpler daily control, a revised schedule or a wider boiler change. Before speaking with a smart thermostat installer in Gretna, note what you’d like to improve and how your household uses heating. That gives the conversation a clear starting point and helps keep recommendations relevant to your home.
If the thermostat project connects to a boiler that needs attention, Gas2Heat.com offers Boiler Installation, Boiler Servicing and Boiler Repairs. These services provide a practical route for homes considering controls alongside boiler work, or needing care for an existing system.
Set out your priorities, then discuss the work that fits. Contact Gas2Heat.com about installation and take the next step towards heating controls that suit your home.
Frequently Asked Questions
How does thermostat placement affect my energy bills?
Placement affects how accurately the thermostat senses the temperature of the space it controls. If it reads warmer than the occupied area, heating may stop sooner; if it reads cooler, the system may run longer. Think about where you spend time and whether doors, sunlight or nearby heat sources influence readings. A well-chosen position helps the control respond to representative room conditions.
How much does thermostat installation cost in Gretna?
The price depends on the thermostat, existing controls, wiring and any extra work needed. A replacement using the existing setup may involve different tasks from a new installation requiring changes to the system. For work offered by Gas2Heat.com, the price depends on the case and is given after a quote request. Sharing the thermostat model and details about your heating system helps define the work involved.
What smart thermostat installation services are available in Gretna?
Smart thermostat installation is available from Gas2Heat.com for homes in its South West Scotland service area, including Gretna, Moffat, Dumfries, Lockerbie, Annan, Lochmaben, Thornhill and Castle Douglas. The service suits homeowners seeking connected temperature control for their heating system. If your project also involves changing the boiler, consider whether boiler installation is relevant to the work you need.
How much does smart thermostat installation cost in Gretna?
The cost depends on the selected device, the existing heating controls, wiring and the work required to connect and set it up. A quote request gives the basis for pricing the specific job. For Gas2Heat.com services, the price depends on the case and is provided after a quote request. Include your thermostat model and boiler details to help describe the installation accurately.
Do smart thermostats work with my boiler and heating system?
Smart thermostats work when their requirements match the boiler or heat pump and its controls. For example, a model designed for one type of connection may not suit a system using another. Check the thermostat’s compatibility information against your heating equipment before choosing it. The boiler model, control interface and available wiring all help determine whether the combination is suitable.
Are Gretna smart thermostat installers Gas Safe registered or otherwise qualified?
Gas2Heat.com states that all its engineers are Gas Safe registered and hold up-to-date certifications. Gas Safe registration is relevant to gas work, such as work involving a gas boiler; thermostat installation also requires appropriate knowledge of controls and connections. Consider the exact tasks involved in your project and the qualifications relevant to those tasks, rather than assuming one credential covers every type of work.
What is included in a smart thermostat installation and how long does it take?
A typical installation takes 1-2 hours, while a straightforward replacement with compatible existing wiring may take 45-60 minutes. Work involving new wiring or smart thermostat setup may take 1.5-2 hours. The job can include fitting and configuring the control, then demonstrating its settings. The system type, existing wiring and setup required affect how the visit proceeds.
What warranties and aftercare do Gretna smart thermostat installers offer?
Warranty terms depend on the thermostat manufacturer and the installer’s workmanship cover, which are separate forms of protection. Read the documents to understand what each covers and how to report a fault. After installation, keep the model details and paperwork together. If an issue arises, note what the thermostat displays and whether the heating system responds; those details can help you describe the problem clearly.
